Group membership guide
This page details how to manage your group membership. If you need additional help, please reach out to our support team.
Choosing a new group subscription (Business Membership)
- Visit the membership page.
- From the dropdown menu on the Business plan, select your desired number of users:

- Click on the purple button to proceed to checkout.
- Complete your payment.
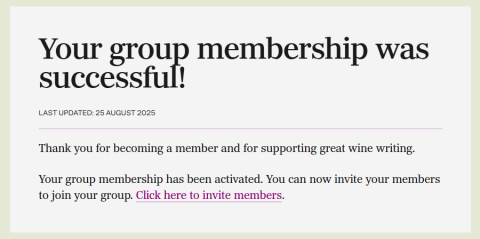
- After successful payment processing, you will be redirected to the site where you will see:
- A confirmation message
- A clickable link: "Click here to invite members"
Managing your group subscription
Step 1: Access your account
- Log in to your JancisRobinson.com account
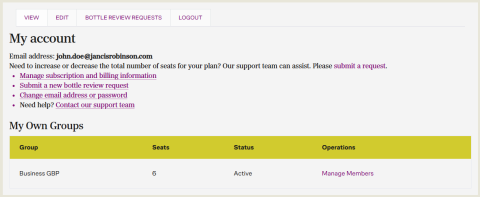
- Click on the "ACCOUNT" button in the top right corner
- Your account dashboard will display your subscription information and group management options
Step 2: View your groups
- Scroll down to the "My Own Groups" section
- Here you'll see your active group subscription with details including:
- Group name (e.g., "Business GBP”)
- Number of seats available
- Current status
- Management options
Step 3: Invite group members
- Click the "Manage Members" link in the Operations column
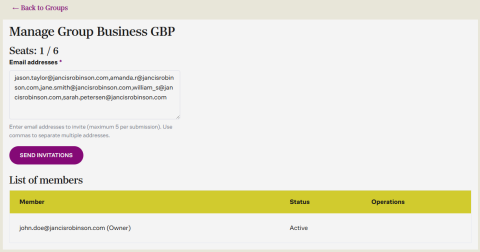
- You'll be directed to the Group Management page where you can see:
- Current seat usage (e.g., "Seats: 1/6")
- Your email address already listed as the Group Owner
- To invite new members:
- Enter up to 5 email addresses in the text field (separated by commas)
- Click the "SEND INVITATIONS" button
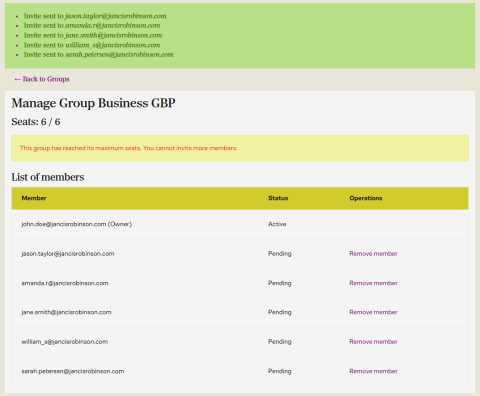
- A green confirmation message will appear when invitations are sent successfully:
Monitoring member status
- Visit the "My account" page.
- The "List of members" table shows:
- All invited email addresses
- Current status (Active or Pending)
- Option to remove members if needed
![Group membership management screen showing list of group members]()
Group membership management screen showing list of group members

- Your seat counter will update to reflect all invitations (e.g., "Seats: 6/6")
- When all seats are filled, you'll see a message stating "This group has reached its maximum seats. You cannot invite more members."
Managing existing members
If you need to remove a member or pending invitation:
- Visit the "My account" page.
- Locate the member in the "List of members" table
- Click "Remove member" in the Operations column
- The member will be removed, and a seat will become available for a new invitation

Group membership notes
Seat allocation:
You (the account owner) automatically occupy one seat in your group.
Invitation limits
You can invite a maximum number of members based on your original Business subscription purchase. To increase the number of seats in your Business plan, please contact our support desk
Batch invitations
You can send up to 5 invitations at one time. To send additional invitations, repeat the invitation process listed above.
Pending invitations
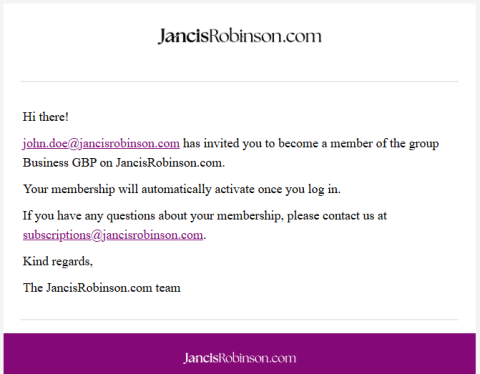
Members will remain in "Pending" status until they accept their invitation
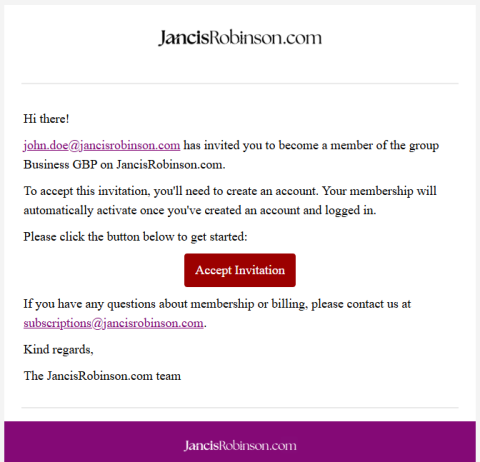
Invitation emails
Invitees will receive an email with instructions to join your group. See the screenshot below: